Nerf Modding Basics Pt 1: disassembly & paint prep
- Spartan Workshop

- Apr 13, 2018
- 3 min read
Updated: Apr 18, 2018
Welcome all, to part 1 of my Nerf modding walk-through. I'm gonna to be going over the basics of getting started with Nerf modding.
First things first you're going to need a gun. And secondly you have to decide whether you want the gun to remain functional, or just be a prop.
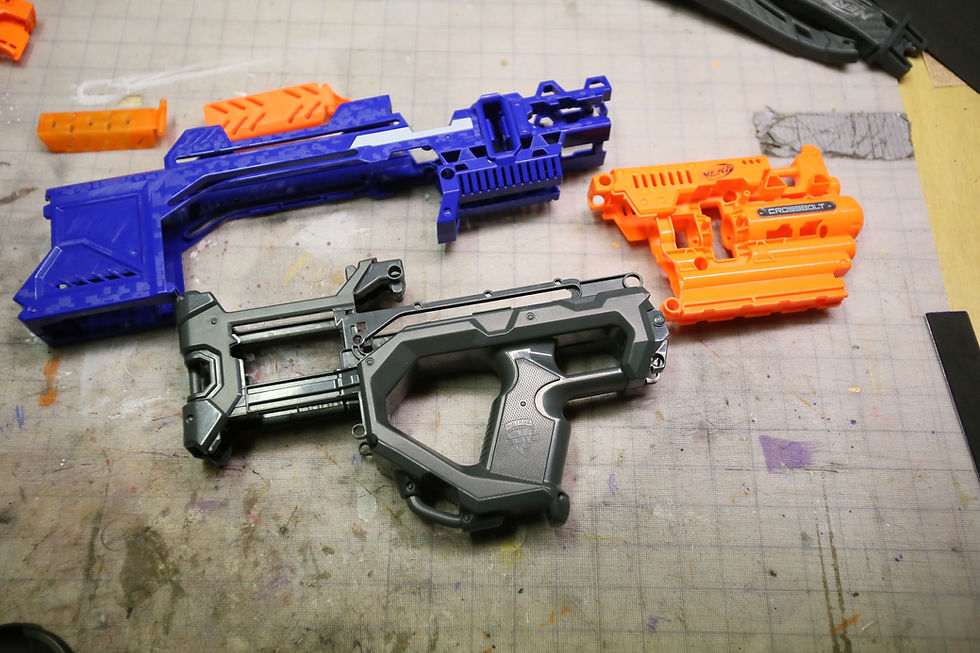
For this tutorial I'm going to be customizing the Nerf Crossbolt as a prop for an upcoming cosplay. The gun will no longer be able to fire, but will have a moving trigger.

Once you've selected a gun, you're going to want to take out all the screws. Personally, I like to keep the screws, springs and other little bits in a cup off to the side so I don't lose them.

Once all the screws are out of the shell CAREFULLY pull the two halves apart. Though if you don't want the gun to stay functional, just tear it open! For the Crossbolt I stripped out all the internal parts and threw them away, all, except the trigger mechanism.
Unfortunately I can't give you an exact guide on every Nerf blaster out here, these are just the basics which can be applied to any toy blaster, Nerf, BoomCo, BuzzBee, Ect.

Once you get the gun apart, it's always a good idea to take some pictures of the internals so you know exactly how to put it back together. (Knowing how the internals are arranged in the shell is important if you'd like the gun to remain functional) The complexity of the internals varies from gun to gun. After you got a picture of the insides, remove the guts and set them aside on a clean piece of cardboard or paper. After you get the insides out of the way it's time to prep the shell for paint.
It's now time for every cosplayer's favorite past-time... you guessed it; sanding!

Most importantly you're going to want a dust mask. Sanding Nerf guns can kick up a lot of plastic dust which you do not want in your lungs. Safety first! You'll also want a few grits of sandpaper as well as a sanding sponge. Both of which you can find at Walmart or pretty much any hardware store.
For sandpaper, I use grits ranging from 100 through 300. And for the sponge it's a 220 grit. With the sandpaper, take off all the warnings and Nerf logos. Like this:

I usually go over them first with the 100 grit and then work my way up to the 300. You could go higher if you want, but 300 is as high a grit as I go. Be gentle, but still with decent pressure. You don't want to take off too much material, or leave a dent.
Not all logos are extruded, some are indented in the shell. If this is the case, no problem! Bondo spot putty is a great way to fill in those pesky things.

*However, if you don't mind logos showing or if you don't have the time to devote to sanding, feel free to skip this step.*
After the warnings and logos are no more, go over the entire shell with the sanding sponge. This will rough up the surface and add something for the paint/primer to bite into. Nerf gun shells have a shining coating on them which doesn't take paint very well. It may go on nice, but it will be more prone to chipping later on if not sanded first.
The sponge will bend and squish, reaching all the spots on the gun. I find using a sponge easier than doing this step with sandpaper.
This first step in Nerf modding is fairly straightforward; remove the screws, take the shell apart, gut the gun, and sand the shell.
Just adept these steps to fit with the gun you're using. In the later steps I will go into more detail.
-Bonus tips-
Keep the internals far enough away from your workspace that dust from sanding won't get in them. Most blaster guts have greased on them and if they get coated with dust it may cause an issue later down the road once you get the gun back together and attempt to fire it.
If you have any tongue depressors or Popsicle sticks handy, wrap some sandpaper around them and use them as makeshift files.

Thanks for taking time out of your day to read through this. If I missed something or if you have any questions, feel free to message me. I'll see you next time.


thumbs up! :)
Wow, this is so cool! Keep up the great work. :)